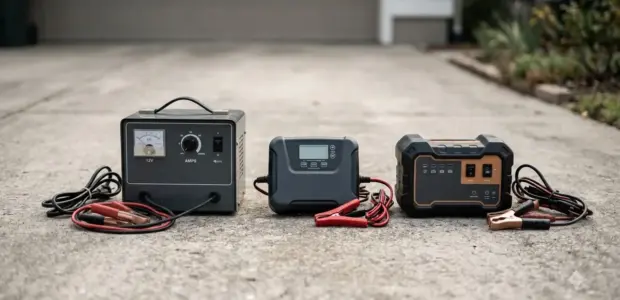

Here is how to use NOCO Genius 1: plug it in, choose the mode that matches your battery, and start charging. The GENIUS1 is a 1A smart charger for 6V and 12V lead-acid batteries, plus 12V lithium batteries.
Choosing the right mode matters most with this charger. A wrong mode can undercharge a battery or charge it at the wrong voltage, so check the battery details first.
Battery charging carries electrical and gas risks. Follow the NOCO Genius 1 user guide and your battery owner’s manual before you connect anything.
What the NOCO Genius 1 Charges
The NOCO Genius 1 charges 6V and 12V lead-acid batteries and 12V lithium batteries at 1A, for batteries up to 30Ah. Its rated capacity is up to 30Ah, so check your battery size against that limit before you start.
NOCO’s data sheet lists low-voltage detection at 1V for both 12V and 6V batteries. Below that level, the charger does not start on its own, which is why Force mode exists. Force mode is covered further down this page, in the section on how to use NOCO Genius 1 with dead batteries.
This guide on how to use NOCO Genius 1 covers the GENIUS1 only. Check the model number printed on your charger before you follow these steps, because other NOCO models use different modes and lights.
Before You Start
Before you connect the GENIUS1, confirm your battery’s voltage and chemistry, because the charge mode depends on both. Learning how to use NOCO Genius 1 safely starts with these details, so gather them first. Each one changes which mode you select. Larger chargers are covered in general battery charger guidance.
- Voltage: confirm whether the battery is 6V or 12V on its label or in the owner’s manual.
- Chemistry: identify whether the battery is standard lead-acid, AGM or lithium.
- Capacity: confirm the battery is 30Ah or smaller.
- Temperature: the charger operates from -4 F to 104 F (-20 C to 40 C), so keep it within that range.
Do not charge a battery that is cracked, leaking or swollen. Replace it or have it inspected first. Checking the battery before you connect anything is the safest part of how to use NOCO Genius 1.
How to Use NOCO Genius 1 Step by Step
To charge a battery, plug the charger into AC power, connect it to the battery, select the matching mode, and start charging. The charger starts in Standby mode when it is first plugged in, so it does not send power to the battery until you choose a mode.
- Plug the charger into an AC outlet. It starts in Standby mode, with no power going to the battery.
- Connect the clamps or eyelet terminals to the battery, following the battery owner’s manual for the correct terminals.
- Press the mode button until the mode that matches your battery lights up.
- Start charging, then watch the charge light until it shows the state you need.
NOCO’s data sheet says the charger automatically returns to its last selected mode after it is left plugged in. Check the mode each time you connect a different battery, because the last mode may not match the new battery. Anyone learning how to use NOCO Genius 1 should treat this as a routine check, not an afterthought.
Charge Modes at a Glance
Knowing how to use NOCO Genius 1 comes down to six modes: Standby, 12V, 12V AGM, 12V Lithium, 6V and Force. You switch between them with the mode button, and each mode has its own indicator light.
| Mode | How to select | Peak charge voltage | Indicator |
|---|---|---|---|
| Standby | Default when plugged in | No power to battery | Orange Standby LED |
| 12V | Press mode button | 14.5V (1A) | White LED |
| 12V AGM | Press mode button | 14.8V (1A) | White LED |
| 12V Lithium | Press mode button | 14.6V (1A) | Blue LED |
| 6V | Press and hold mode button for 3 seconds | 7.25V (1A) | White LED |
| Force | Press and hold mode button for 5 seconds, then select a mode | Not listed in the mode table | Charge Mode LED and Charge LED alternate |
The 12V, 12V AGM and 12V Lithium modes cycle with a short press of the mode button. Pick 12V AGM only for AGM batteries and 12V Lithium only for lithium batteries, because their peak voltages differ from standard 12V lead-acid charging. Keep this table handy as you learn how to use NOCO Genius 1 with different batteries.
For a 6V battery, press and hold the mode button for 3 seconds to enter 6V mode. The full mode list and LED colors are in the user guide that came with the charger and on NOCO support, which you should keep with it.

Force Mode for Batteries the Charger Cannot Detect
Force mode lets you start charging a battery whose voltage is too low for the charger to detect. It is the one part of how to use NOCO Genius 1 that works differently from normal charging. You enter it by holding the mode button for 5 seconds, then selecting the mode that matches the battery.
- Confirm the charger is plugged in and the clamps are connected to the battery.
- Press and hold the mode button for 5 seconds to enter Force mode.
- Select the mode that matches the battery.
- Watch the lights. The Charge Mode LED and the Charge LED alternate while Force mode is active.
Force mode lasts 5 minutes. After that, the charger returns to normal charging and low-voltage detection starts again. If the battery still will not charge normally, stop and check the connections and the battery.
NOCO’s data sheet describes Force mode as a way to take manual control and charge batteries down to zero volts. Use it only when the charger does not start on its own, not as a routine setting for a healthy battery. This is the cautious way to handle how to use NOCO Genius 1 with a dead battery.
Reading the Charge Light
The charge light pulses red while the battery is under 75% charged, pulses green during bulk charge, and stays solid green at 100%. Use these four states to judge progress, because they tell you more than the clock does. Reading the light is part of how to use NOCO Genius 1 well, especially on a battery that charges slowly.
- Pulsing red: the battery is under 75% charged.
- Pulsing green: bulk charge is complete, and the charger is optimizing the battery for longer life.
- Solid green: the battery is 100% charged.
- Alternating Charge Mode LED and Charge LED: Force mode is active.
A solid red error light is a different signal. The user guide lists overvoltage, a bad battery and reverse polarity as causes, so check the connections and the battery before you try again.

Common Mistakes to Avoid
The most common mistake is choosing the wrong mode, which can charge a battery at the wrong voltage. Most mode errors come from skipping the battery check at the start, and that check is the core of how to use NOCO Genius 1 without trouble. For a quick start with no outlet, see portable jump box steps.
- Using 12V Lithium on a lead-acid battery, or 12V AGM on a standard battery, because the peak voltages differ.
- Starting a 6V battery in a 12V mode.
- Using Force mode on a battery the charger already detects.
- Charging outside the -4 F to 104 F operating range.
- Keeping the last mode after moving the charger to a different battery. The data sheet says the charger returns to its last mode, so check the mode each time.
If you are unsure about the battery, check its label or owner’s manual before you press any button. The charger cannot tell you what chemistry or voltage your battery is.
Frequently Asked Questions
Does the NOCO Genius 1 charge lithium batteries?
Yes. The GENIUS1 has a 12V Lithium mode with a 14.6V peak at 1A, and knowing how to use NOCO Genius 1 for lithium comes down to selecting that mode. Select it only for lithium batteries, and check the battery’s label or owner’s manual to confirm the chemistry before you start.
What size battery can the NOCO Genius 1 charge?
The GENIUS1 is rated for batteries up to 30Ah at 1A. Check the battery’s capacity on its label before you connect the charger, and do not expect the charger to reach full charge faster than its rated current allows.
What does the charge light mean?
Pulsing red means the battery is under 75% charged. Pulsing green means bulk charge is complete, and solid green means the battery is 100% charged. Alternating lights during Force mode mean the charger is in Force mode.
Is the NOCO Genius 1 safe to leave plugged in?
NOCO’s data sheet says the GENIUS1 can be left plugged in around the clock with no worries of overcharging, because it is built as a battery maintainer. Still, check the battery and the connections every so often, and follow the user guide for how to use NOCO Genius 1 with your battery type.
How long does Force mode run?
Force mode runs for 5 minutes. After that, the charger returns to normal charging and low-voltage detection starts again. If the battery still does not charge, check the connections and the battery before you try Force mode again.
How do I switch from 12V to 6V on the NOCO Genius 1?
Press and hold the mode button for 3 seconds to enter 6V mode. Use a short press of the mode button to cycle through the 12V modes instead. Once you know how to use NOCO Genius 1 for both voltages, switching takes only a few seconds. Confirm the battery is 6V on its label before you select 6V mode.
When you finish learning how to use NOCO Genius 1, remember this: if the charger shows a light that does not clear after you check the connections and the mode, stop charging. Have the battery tested by a qualified technician before you try again.